A few weeks ago, a friend and I came up with an idea for a website that would link two people together and have them work together. The project will be a good challenge for me since I have no experience doing half of the things we want to… but you have to start somewhere! I decided to get going with the collaborative aspect of the site by working with WebSockets. A bit of searching revealed that node.js and socket.io would help me out, but I didn’t really understand much more than that. So the smart thing seemed to be that I should blindly dive in and find out what’s going on. In this post I’d like to share what I learned in trying to write a super-basic chat program, starting from the very beginning.
What is node.js?
The name tricked me a little – node.js (http://nodejs.org/) isn’t simply a .js file you add to a script tag in your markup… far from it. It runs on a server and uses Google’s V8 JavaScript engine to perform evented I/O (input/output). This means that instead of performing server tasks synchronously, node.js uses callbacks to execute certain code when the task is complete, freeing it up to move on to whatever the next task might be in the meantime. It’s surprisingly easy to code a server, especially if you’re used to JavaScript:
var http = require('http');
http.createServer(function (req, res) {
  res.writeHead(200, {'Content-Type': 'text/plain'});
  res.end('<h1>I am a server.</h1>');
}).listen(8124, "127.0.0.1");
The first line declares use of the HTTP interface. With that, you create a server, write a response, and tell the server to listen at a given port. Boom. Server.
What is socket.io?
socket.io (http://socket.io/, though the GitHub page explains more) is an HTTP Socket implementation that runs atop node.js. It can use any number of transportation methods (WebSockets, Flash Sockets, AJAX long polling and more), but the code that you’ll have to write doesn’t have to change. Its implementation isn’t as simple as node.js, but here’s a snippet:
socket.on('connect', function () {
  $('#log').append('<li>Connect</li>');
});
This code runs on the client and specifies a function to be run when the socket has been connected successfully. In this case, a jQuery call to append a list item to a list.
A simple chat program
With this, we have everything we need to make a basic chat program. And by basic, I mean basic: no usernames, no log. Just sending messages. I’m going to start with describing the code before I get into how to actually run it, since it’s far more exciting and applicable. If you want to download my source, grab it here.
Writing the server
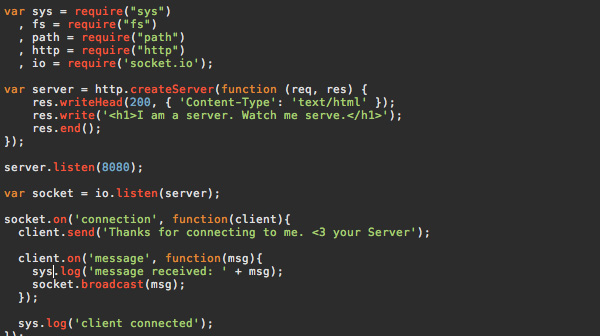
Open up server.js, I’ll also add the code below:
var sys = require("sys")
  , fs = require("fs")
  , path = require("path")
  , http = require("http")
  , io = require('socket.io');

var server = http.createServer(function (req, res) {
    res.writeHead(200, { 'Content-Type': 'text/html' });
    res.write('<h1>I am a server. Watch me serve.</h1>');
    res.end();
});

server.listen(8080);

var socket = io.listen(server);

socket.on('connection', function(client){
  client.send('This is your server. Thanks for connecting to me.');

  client.on('message', function(msg){
    sys.log('Message Received: ' + msg);
    socket.broadcast(msg);
  });

  sys.log('Client Connected');
});

sys.puts('Server running at http://127.0.0.1:8080/');</pre>
The first thing is to get references to everything we’ll need – http, sys, etc. (I went through a number of code samples, cutting and pasting into mine before I got this to work, so some of these might not be required any more.) The next thing we do is create the server the same way we did in the node.js example, except this time we store the returned value as a variable. Next we tell the server to listen to port 8080.
The next chunk of code is the implementation of socket.io. We create a variable named socket and set it using the socket.io library and our reference to the server. Then we add a listener to socket giving it some code to execute when a client connects:
- Send them a welcome message.
- Add a listener for messages sent from them. In the callback for this listener, we also call `socket.broadcast()` to send their message out to all other clients.
- Log their connection.
That’s it! The last line of code is just there to log the server’s creation and give some feedback.
Writing the client
The client comes as an html file and a js file. The markup is simple – import socket.io.js from the server, import jQuery and import my own js file. Then a text input, a button and an unordered list to serve as our log.
The client.js file handles all of the functionality. Here it is:
var socket;
var inputData;

function initSocket(){
  WEB_SOCKET_SWF_LOCATION = 'http://127.0.0.1:8080/socket.io/WebSocketMain.swf';
  socket = new io.Socket('127.0.0.1', {port:8080});
  socket.connect();

  socket.on('connect', function () {
    $('#log').append('<li>Connect</li>');
  });

  socket.on('message', function (msg) {
    $('#log').append('<li>Received: ' + msg + '</li>');
  });

  socket.on('close', function () {
    $('#log').append('<li>Close</li>');
  });

  socket.on('disconnect', function () {
      $('#log').append('<li>Disconnect</li>');
  });
}

function initDom()
{
  $('#inputBtn').bind('click',function(){
    inputData = $('#inputTxt').attr('value');
    socket.send(inputData);
    $('#log').append('<li>Sending: ' + inputData + '</li>');
  });
}

$(document).ready(function(){
  initDom();
  initSocket();
});
I broke this out into two main functions, initDom() and initSocket(), which are called in that order from the jQuery document ready.
The first thing we have to do in initSocket() is set the value of WEB_SOCKET_SWF_LOCATION. This is a variable in socket.io.js that points to the swf used if socket.io chooses Flash sockets as its method for sending data. It lives on the server, so we give it a path to that. Then we instantiate and connect the socket variable, which will be what we use to communicate with the server. After that is a bunch of listeners for socket communication, each of which will output something in our debugger. Of note is the message listener, which comes with a msg parameter. In our case, this is triggered two different ways from the server: on connection, when the server fires its welcome message with client.send(); and when the server receives a message and sends it back out using socket.broadcast().
The initDom() function binds a click listener to our button. The listener sends the form input using socket.send(). This will trigger client.on(‘message’) on the server.
Now we’re all set and ready to run.
Installing node.js, npm and socket.io
The best instructions I found for this are here: https://gist.github.com/579814. In particular, the first entry, node-and-npm-in-30-seconds.sh. You can just paste each line into Terminal and hit enter. A lot of other installation tutorials I found will install node into root, which npm will complain about in the next step. npm (node packet manager) is a tool used to install socket.io, among other things that I haven’t found out about yet. These instructions install node into your user folder, which npm likes. There is one drawback to this, which is that running node without root privileges prevents it from serving up the Flash policy file from the port Flash expects it to, which slows down initial connections. But since I’m running all of this locally, that’s not a huge concern.
Once you have npm, you can run npm install socket.io to install socket.io.
Running the code
In terminal, navigate to the folder where you have your code. Then you can just type node server.js and your server will start. Sometimes I would get an error that node isn’t found, even though I had just installed it. To get it to reregister, you can run . ~/.bashrc and Terminal should pick it up again. To stop the server once it’s running, you can hit Ctrl+C. If you navigate to the servers address in the browser (in my case, http://127.0.0.1:8080/) you should see the message from the http.createServer() function in server.js.
Now you can open up the index.html file in your browser. You should be running this from a host (I use MAMP Pro). Open the site in two different browsers and behold as messages are sent!
What next?
A few things I want to pursue as next steps:
- Figure out how to run this from a server. Pretty useless if it’s on localhost.
- Groups: if I have four people connected to the server, I’d like to figure the best way to split them up into two groups of two. Chat rooms, I suppose.
- More than text: Start sending things between computers that aren’t just text, like that mouse cursor experiment from last year.