For the audio lab in PComp, I built the Drinking Buddy. He just wants to sing German drinking songs with you! And even though he probably thinks the more he drinks, the better he gets… that just isn’t true. As your breath alcohol increases, more error is introduced into the playback of the song. To wit:
The alcohol sensor (MQ-3 from SparkFun) was fun to play with, once I got it working. Every MQ-3-related blog post you come across will mention its misleading datasheet, and it’s true, it was a pain to hook up. I nearly gave up after trying many different configurations, but then I found this blog post that set me in the right direction. First, I was confused about which direction the sensor needed to be installed in, since the diagram shows the left and right pins serving different functions despite the casing having no indication of pin name, however it seems that this is a nonissue. Second, the device has a recommended 48 hour break-in period, so it was hard to tell if I had everything wired correctly but was just getting noisy data, or if my wiring was off.
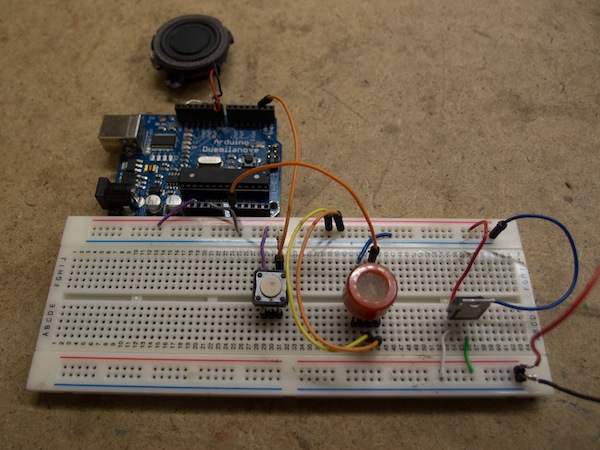
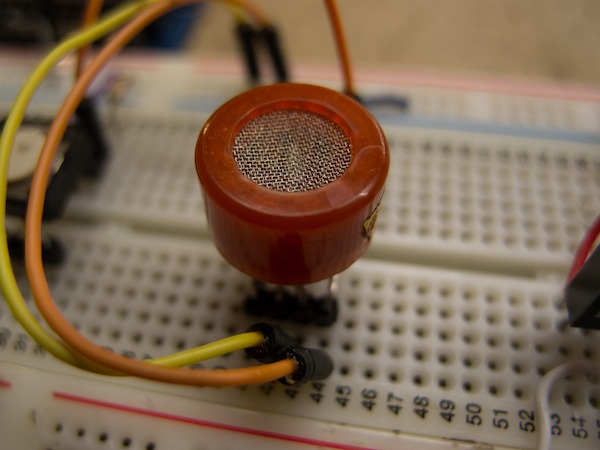
Here’s how I ended up wiring it: I pass 5 volts through the “H” pins. They are the middle ones on either side. Various blogs recommended that you do not use the Arduino’s 5v output for this, so I hooked up a 9v battery with a voltage regulator. I also put 5 volts into the “A” pin, which can be either of the pins to the side of the +5 “H” pin. The “B” pin, located opposite of the “A” pin, gets grounded via a 220 ohm resistor and then sent to the Arduino’s analog in (I believe this is called a pull-up resistor?). The Sensor Workshop blog post I linked before has the analog out coming from the “H” pin, however this didn’t work for me (nor would I expect it to, I’m not sure why they have it that way).
At that point it was clear that when I blew alcohol across the sensor (using hand sanitizer as my “test booze”), the Arduino registered a higher output value. After leaving it on for 5 or so hours today, it works even better. One funny aspect of the sensor is its “hangover” period: it will continue to register alcohol in its sensor even after you’ve blown it over.
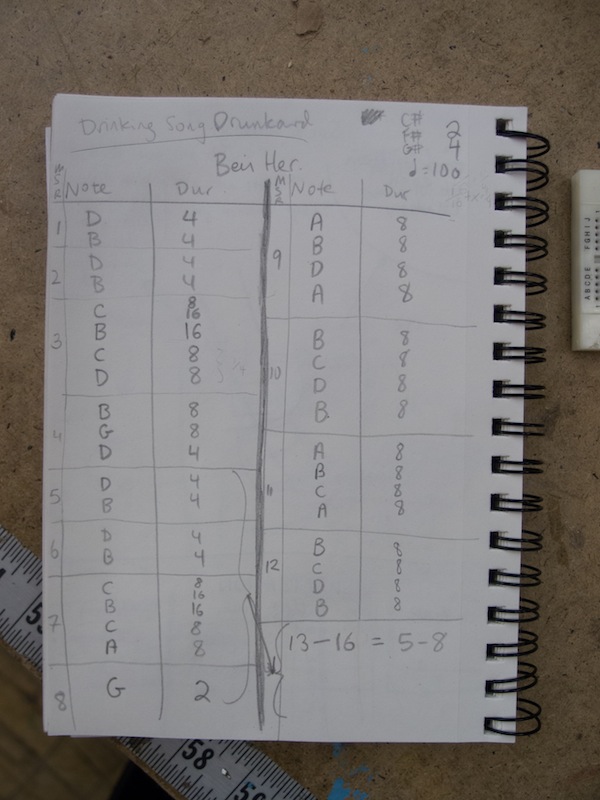
The audio aspect of the program was a lot of fun. First, I had to transcribe the song into a format that the Arduino would understand. I downloaded a midi file of the song and opened it in Harmony Assistant, which revealed the musical notation. I took those notes and charted them out, as can be seen below.

Finally, I entered that info into code using the Pitches.h library.
int melody[] = {
  NOTE_D3, NOTE_B2, NOTE_D3, NOTE_B2,
  NOTE_C3, NOTE_C3, NOTE_B2, NOTE_C3, NOTE_D3, NOTE_B2, NOTE_G3, NOTE_D3,
  NOTE_D3, NOTE_B2, NOTE_D3, NOTE_B2,
  NOTE_C3, NOTE_C3, NOTE_B2, NOTE_C3, NOTE_A2, NOTE_G2,
  NOTE_A2, NOTE_B2, NOTE_D3, NOTE_A2, NOTE_B2, NOTE_C3, NOTE_D3, NOTE_B2,
  NOTE_A2, NOTE_B2, NOTE_C3, NOTE_A2, NOTE_B2, NOTE_C3, NOTE_D3, NOTE_B2,
  NOTE_D3, NOTE_B2, NOTE_D3, NOTE_B2,
  NOTE_C3, NOTE_C3, NOTE_B2, NOTE_C3, NOTE_A2, NOTE_G2
};

int durations[] = {
  4, 4, 4, 4,
  8, 16, 16, 8, 8, 8, 8, 4,
  4, 4, 4, 4,
  8, 16, 16, 8, 8, 2,
  8, 8, 8, 8, 8, 8, 8, 8,
  8, 8, 8, 8, 8, 8, 8, 8,
  4, 4, 4, 4,
  8, 16, 16, 8, 8, 2
};
To “drunkify” the notes, I wrote a function that randomly changes the pitch and duration values. Since the Pitches.h constants only represent integer values, you can increase or decrease the pitch by increasing or decreasing the value. Same with note duration, except since that uses milliseconds, I just add or subtract a larger number. The drunkenness parameter changes both the likelihood that a pitch will be altered and the intensity with which it will be altered.
void drunkifyNote(int pitch, int duration, float drunkenness) {
  boolean drunkifyPitch = binaryRandomWithProbability(drunkenness);
  boolean drunkifyDuration = binaryRandomWithProbability(drunkenness);

  if(drunkifyPitch) pitch += (random(20) * drunkenness) – 10;
  if(drunkifyDuration) duration += (random(200) * drunkenness) – 100;

  tone(speakerPin, pitch, duration);

  delay(duration + 30);
}

boolean binaryRandomWithProbability(float probability) {
  int rand = random(100);
  boolean returnVal = false;
  if(probability * 100 > rand) returnVal = true;
  return returnVal;
}
After plugging in the sensor’s value, I was all set! Below, pictures of the complete setup and a close-up of the MQ-3.

