Core Interaction Lab: Week 2
Review HTML, CSS, and the Web Inspector
Class Notes
HTML Review
Intro
HTML stands for Hypertext Markup Language. Hypertext is used to mean text containing references that can be accessed immediately. Hypertext is the backbone of the web; it supplies all the content for every webpage we visit. A markup language a way of organizing information into a format that both humans and computers can agree on, specifically for distinguishing the content of a text from any required annotations. For example, when your history teacher handed you back a paper with their comments on it, it is considered to be "marked up." You could tell your text from your teacher's text because they likely wrote in a different color ink than you did. This is what a markup language strives to do on computers. With HTML, the "marking up" gives us a way to assign hierarchy, references, order, and meaning to our underlying text.
Tags
The basic building block of HTML is a tag. There are many different kinds of tags in HTML that allow us to define headers, paragraphs, links, sections, lists and so on. A tag is formatted by placing its name within angle brackets. For example, a tag named h1 looks like <h1>.
The majority of tags come in two parts: an opening and a closing. What we saw above is the tag's opening. To close a tag, we do the same thing, except with a forward slash before the tag's name, like </h1>.
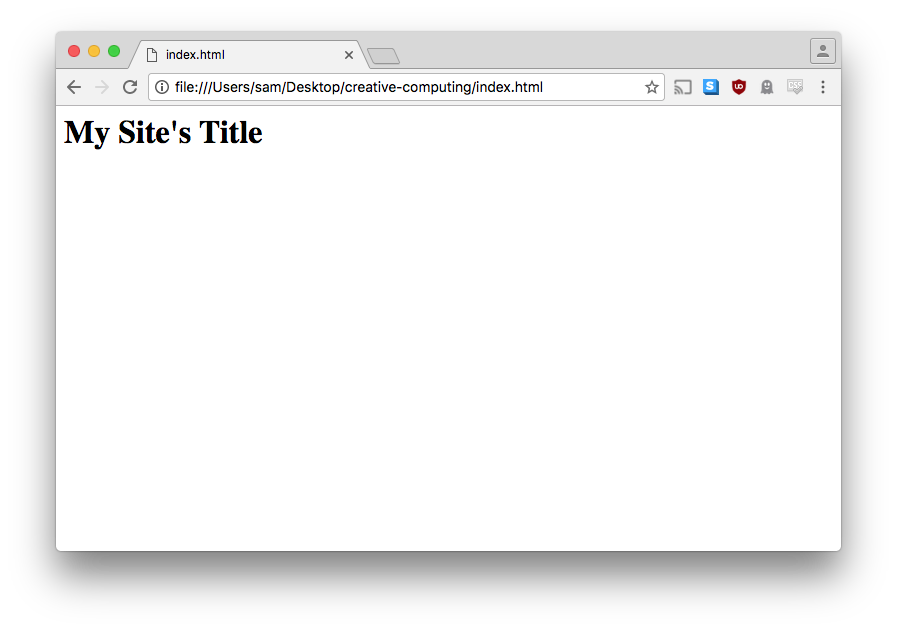
<h1> is the tag for a level 1 heading. What we put in between the opening and closing of the tag is its contents. If we type <h1>My Site's Title</h1> into our text editor, save the file as index.html, and drag it over our web browser, we will see our header displayed correctly.

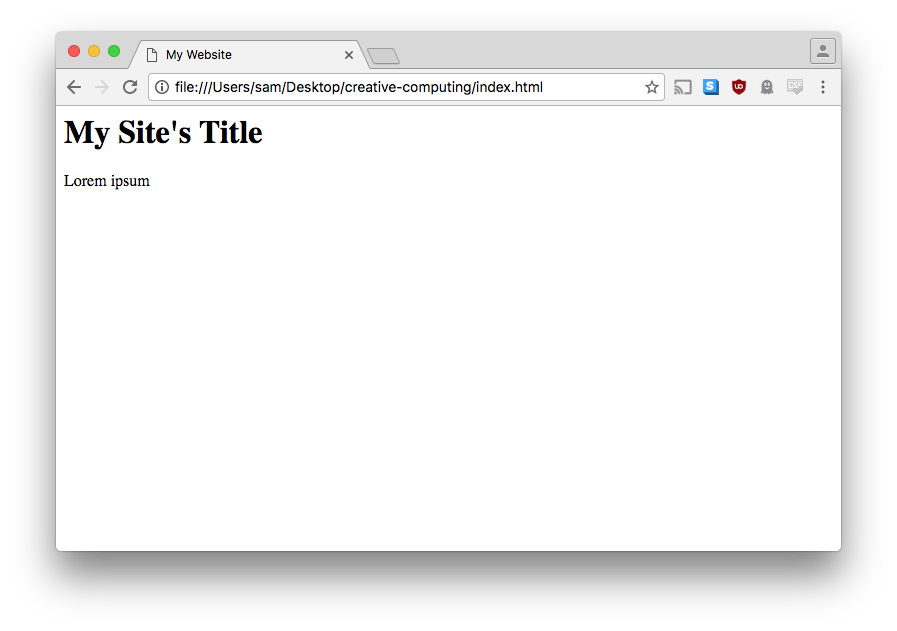
The <p> tag is used for paragraph text. If we add <p>Lorem ipsum</p> to our HTML, we can see that the browser interprets it differently.

There are things we can control with an HTML document besides just the body of the webpage. For example, we can change the words that show up in the tab of the browser above the address bar. In order to do this, we need to add some extra tags to help the browser understand our intentions. Update your code to look like this:
<!DOCTYPE html>
<html>
    <head>
    </head>

    <body>
        <h1>My Site's Title</h1>
        <p>Lorem ipsum</p>
    </body>
</html>
While none of these new tags change the appearance of the webpage, they are important because they facilitate the organization of our HTML. We can now add <title>My Website</title> inside of our <head> tag and when we refresh the page the text in the tab will have changed.

You will also notice that we can put tags inside of other tags. This is called nesting. When you do this, you must be certain to close the tags in the reverse order that you opened them. For example, this is invalid:
<html>
<head>
</html>
</head>
The correct version of the above example looks like this:
<html>
<head>
</head>
</html>
When nesting tags, it is conventional to indent the child tag. You can accomplish this by hitting the tab key on your keyboard. Properly indented code is helpful for scanning your document and identifying errors. The HTML, CSS and JS that you write for this class must be properly indented.
The tags we just added all have a specific meaning and are in fact required for every HTML page. Let's go over them:
<!DOCTYPE html>is the doctype (short for document type) of our HTML file. It's not technically an HTML tag, but a way of telling the browser that we intend this file to contain valid HTML. Without a doctype, the browser would enter what's known as "quirks mode," where browsers revert to older, more unpredictable behaviors. Web browsers have been around since 1990, and while they've always used HTML, what we've been able to do with HTML and how browsers have interpreted it have both changed dramatically over the years.- The
<html>tag is the outermost tag of an HTML file and it defines the root of your document. - The
<head>tag provides metadata about your document, such as its title and any other files it needs to load. - The
<body>tag contains all the content of your document. Anything that you want to be visible on the page must go in here.
Attributes
Make a new file called week2.html. Set it up with a doctype and html, head and body tags, give it a title and some content.
Now we can set up a link between our two files. Links are created with the <a> tag (a stands for anchor). The text contained within an a tag will become clickable, and when clicked, the browser will go to the provided page. In order for the browser to know where to go, we need to provide a reference URL within the a tag like so:
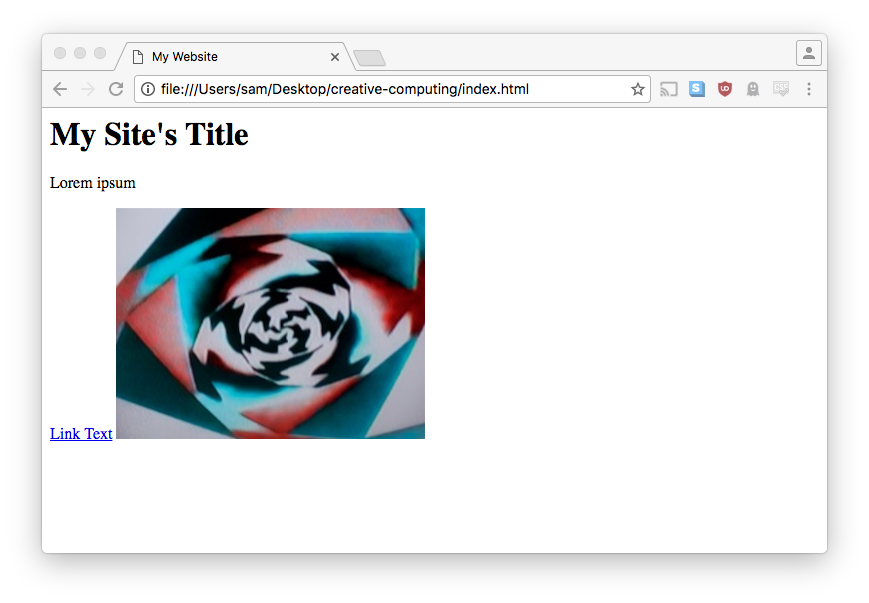
<a href="week2.html">Link Text</a>href is called a tag attribute. There are many different types of attribute that we will encounter as the semester goes on. Attributes consist of two parts, a name and a value. They are separated by an equals sign (=) with the name on the left and the value on the right. Add the above code to your index.html and see what happens.
We can also use HTML to insert images into our document. Find an image on the internet and save it into the folder alongside your HTML files. Then, insert the following into your HTML:
<img src="test.jpg" />The img tag, like the a tag, has an attribute, except this time it is src (as in "source"). The src attribute allows us to point the tag to the location of our image, which for me is test.jpg. You should set the value of src to the name of your image file.
One new thing with the img tag is how there is no distinct closing tag. The forward slash before the closing angle bracket indicates that this is a "self-closing" tag. We will come across a few more examples of self-closing tags as the class progresses.
Here's what your code should look like at this point:
<!DOCTYPE html>
<html>
    <head>
    </head>

    <body>
        <h1>My Site's Title</h1>
        <p>Lorem ipsum</p>
        <a href="week2.html">Link text</a>
        <img src="test.jpg" />
    </body>
</html>

HTML Review Summary
Let's summarize our HTML review:
- HTML (Hypertext Markup Language) is the language we use to create content for the web.
- The basic building block of HTML is the tag. Tags have a beginning, ending, and name, for example
<h1></h1> - Your HTML files must contain a doctype and the
html,head, andbodytags. - All HTML tags can also have attributes. Attributes provide extra information that a tag might require in order to function. For example, we tell an
atag where to link to with thehrefattribute.
CSS Review
CSS stands for Cascading Style Sheets. If HTML is the content layer of your website, CSS is the presentation layer. It lays out the rules for how your website should look.
The CSS syntax looks like this:
selector {
    property1: value1;
    property2: value2;
}
That is, you have your selector followed by an open and close curly brace. Inside of the curly braces, you can add as many property-value pairs as you wish. A property is separated from its value with a colon : and the pair is terminated with a semicolon ;. For example:
p {
    font-family: "Comic Sans MS";
    border: 3px dotted green;
}
This says "for all <p> tags, set them in Comic Sans and give them a three pixel dotted green border."
Selectors, Properties, and Values
Let's break this down. There are three parts to a CSS rule: selectors, properties, and values.
Selectors define to which element a style will be applied. Selectors can be the name, ID or class of the tag(s). For example, to apply a style to every <p> tag, our selector would be simply p. To apply a style to an element with the ID of my-picture, our selector would be #my-picture. And for an element with the class of student-name, our selector would be .student-name.
Selectors can also be nested. For example, #header p is the selector for <p> tags inside the element with the ID of header. There are many other ways to select elements that we will come across! Check some of the reference materials for a head start.
Properties and values refer to the specific style you want to set, and the value to which you want to set it. For example:
colorchanges the color of text. It accepts any of the preset named colors, a hex code such as#FF0000, or an RGB value likergb(255,0,0).background-colorchanges the background color of an element, and accepts the same colors as above.borderis slightly more complex as it takes a number of options, like2px solid redfor the weight, style, and color of the border respectively.line-heightandletter-spacingadjust some of the typographic qualities of text. They take a number and a unit, like20pxfor 20 pixels. There are other kinds of units but we will stick with pixels for now. You can also use negative values, like-20px.font-familywill change the font. There is a preset list of fonts that most web browsers have, these are called web safe fonts (we will cover custom fonts in a later class). Fonts also have many other properties likefont-weightandfont-size.
IDs and Classes
What if we wanted to refer to a specific element, or a group of elements based on something other than their tag name? This is where IDs and classes come in.
IDs identify individual elements. You might have 12 <div> tags on your page, but only one of them is the tag that holds a video. If you want to easily find it on the page, you can give it an ID. IDs are added to tags as an attribute, just like we've seen with href and src. In this case, it would look like
<div id="video-holder">
</div>
Of course, the ID can be whatever you want it to be, as long as it isn't used anywhere else on the page.
Classes are similar to IDs except they can be used multiple times and an element can have multiple classes. For example, let's say we wanted to distinguish internal links from external links. Classes are a perfect solution for this:
<p>
    Some links are
    <a href="index.html" class="internal">internal</a>
    but
    <a href="http://newschool.edu" class="external">this link</a>
    and
    <a href="http://google.com" class="external">this link</a>
    are external.
</p>
When it comes to CSS, IDs and Classes are frequently used to give us hooks into specific elements or groups of elements. To look something up by its ID, we use a pound sign (a.k.a. hashtag: #). To look something up by its class name, we use a period (.). For example, an element with the ID classwork would be selected in CSS with #classwork. So, the following CSS...
#classwork .highlight {
    background-color: yellow;
}
...says "for all elements with a classname of highlight inside the element with the ID classwork, give them a yellow background."
Specificity
Consider the following HTML and CSS:
<p id="my-email">
    brenners@newschool.edu
</p>
p {
    color: red;
}

#my-email {
    color: green;
}
What color do you think the text will be? Hover here for the answer: Green!
This is because the selector #my-email has a higher specificity score than the selector p. The rules of CSS specificity get pretty complex (and for this class I don't expect anyone to remember them), but a very simple version is that IDs are the highest scoring, then classes, then tag names. Keep that in mind when writing your CSS. Order also matters, so for example:
p {
    color: purple;
}

p {
    color: yellow;
}
What color do you think the text will be? Hover here for the answer: Yellow!
In this case, both selectors have the same specificity, but the one that sets p color to yellow comes last, so it wins.
Saving Styles
To actually set the styles, we can write them in a CSS file which is linked to our HTML page. To do this, we can make a file called style.css (you can name it whatever you'd like, as long as it ends in .css). Then we can use the <link> HTML tag to load those styles into our page:
<link rel="stylesheet" href="style.css" />This code goes in the <head> of our HTML, and then all of our CSS goes in the CSS file.
Web Inspector
The web inspector is a very important tool that will help us figure out what's going on with our websites. You can access the web inspector by right-clicking on your page and selecting "inspect." When the window loads, make sure you're on the tab that says "Elements." You can reposition the window by pressing the three vertical dots and choosing a new dock side.
On the left of the web inspector you can see the HTML elements of our page. Hovering over an element will highlight it in the body of the webpage. On the right of the inspector, you can see all of the styles that are being applied to that element. Notice that there are styles being applied even when you don't explicitly provide them - this is called the user agent stylesheet. These are the default styles that the browser applies to every page. In Google Chrome (and most modern desktop browsers), this means that text is in Times New Roman, links are blue, header text is bigger than paragraph text, and so on.
Going down the styles being applied to any element, the first thing you will see is a block called element.style. These are the styles being applied specifically to this element. Generally it will be empty. Try clicking in between the two curly brackets and typing in background-color: red;. You'll notice that this element - and only this element - turned red.
Now refresh the page. Our changes have disappeared! Things that we do in the web inspector are always temporary. We have to write styles in to our CSS file if we want to make them permanent. This makes the web inspector a great place to play around and quickly experiment with CSS.
If you have any styles being applied from a CSS file, you'll see them right below your element.style block. The higher it is in this column, the higher specificity score it has. Finally, on the right on the selector, you'll see a file name and a line number - in the screenshot above, the first one is cc.css:9. This means that this CSS block is defined in your file named cc.css on line number 9. This makes it easy to go back and forth between your code and the inspector.
In-Class Exercise: Recipe
Your in-class exercise for this week is to markup and style a recipe using HTML and CSS. Before writing any code, plan out which tags you think are most appropriate to use for each part of the recipe, and sketch out how you'd like your recipe to look.
Your HTML should include the following tags: h1, p, a, ul, ol, and li. You can of course use other tags if you wish.
When you're done with your recipe, please add a link to it from your homepage and push it all up to Github.
Here is the raw text for the recipe:
Best Chocolate Chip Cookies
from http://allrecipes.com/recipe/10813/best-chocolate-chip-cookies/

Prep: 20 m
Cook: 10 m
Ready In: 1 h
Servings: 24

Ingredients

1 cup butter, softened
1 cup white sugar
1 cup packed brown sugar
2 eggs
2 teaspoons vanilla extract
3 cups all-purpose flour
1 teaspoon baking soda
2 teaspoons hot water
1/2 teaspoon salt
2 cups semisweet chocolate chips
1 cup chopped walnuts

Directions

1. Preheat oven to 350 degrees F (175 degrees C).
2. Cream together the butter, white sugar, and brown sugar until smooth.
3. Beat in the eggs one at a time, then stir in the vanilla.
4. Dissolve baking soda in hot water. Add to batter along with salt.
5. Stir in flour, chocolate chips, and nuts.
6. Drop by large spoonfuls onto ungreased pans.
7. Bake for about 10 minutes in the preheated oven, or until edges are nicely browned.