Core Interaction Lab: Week 1
Intro, Development Environment, Github
Skip to Intro, Development Environment, or Github.
Intro
Development Environment
Download and install Atom. Atom is a text editor that we will use for this class to write HTML, CSS and JS files.
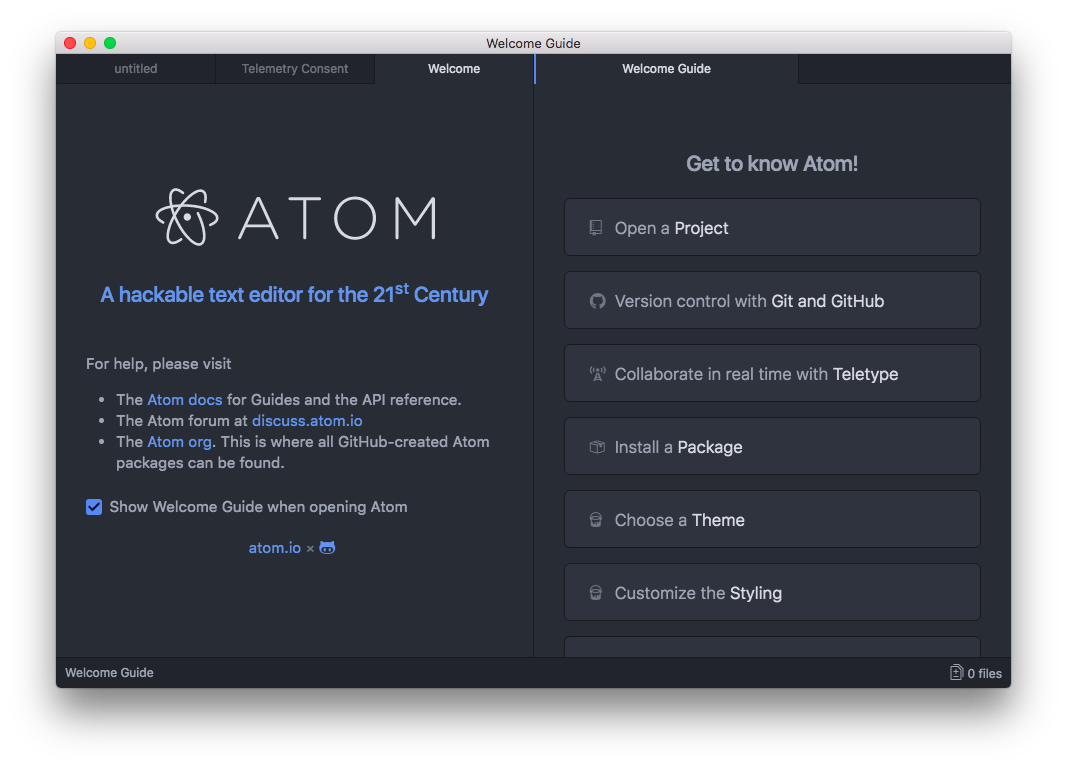
When you have opened Atom, click the button that says "Install a Package" and then click "Open Installer." A new window pops up under the "Settings" tab - at this point, you can exit out of all the other tabs.
In the text input field, search for the package linter-htmlhint. When the search results come up, find the package that has the same name and click "Install". When this package has finished installing, a new popup will appear asking you if you want to install dependencies for the package. Click yes, and repeat this until all dependencies have been installed.
Repeat the process for two more packages, linter-csslint and linter-jslint. These packages will help show us when we've made mistakes writing HTML, CSS and JavaScript, which should hopefully help us prevent bugs and write good code.
Github
We will be using Github to host our Core Interaction projects on the internet. If you've already set up a Github account for another class, skip here. Otherwise, read on.
By now you should have already downloaded Github Desktop and made an account on Github.com. When you've done that, open Github Desktop and sign in to your account.
Projects on Github are called repositories, or repos for short. We will make a repository for this class which will hold all of our assignments. To do that, click "Create New Repository" from the Github Desktop home screen.
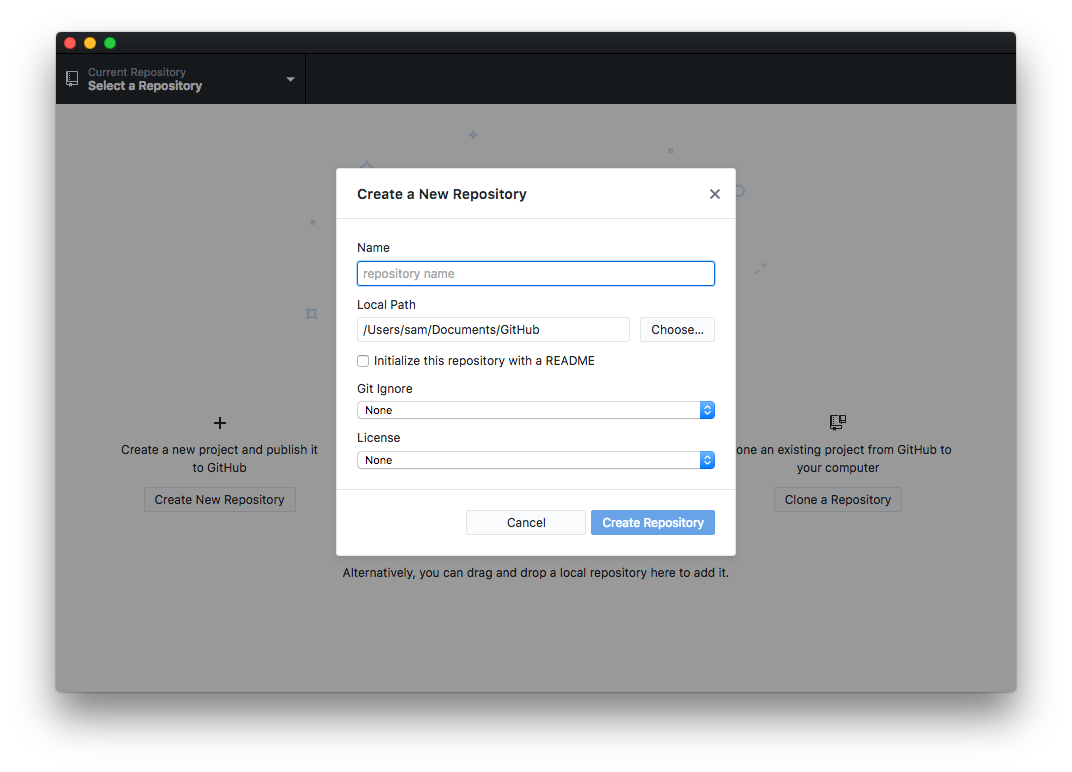
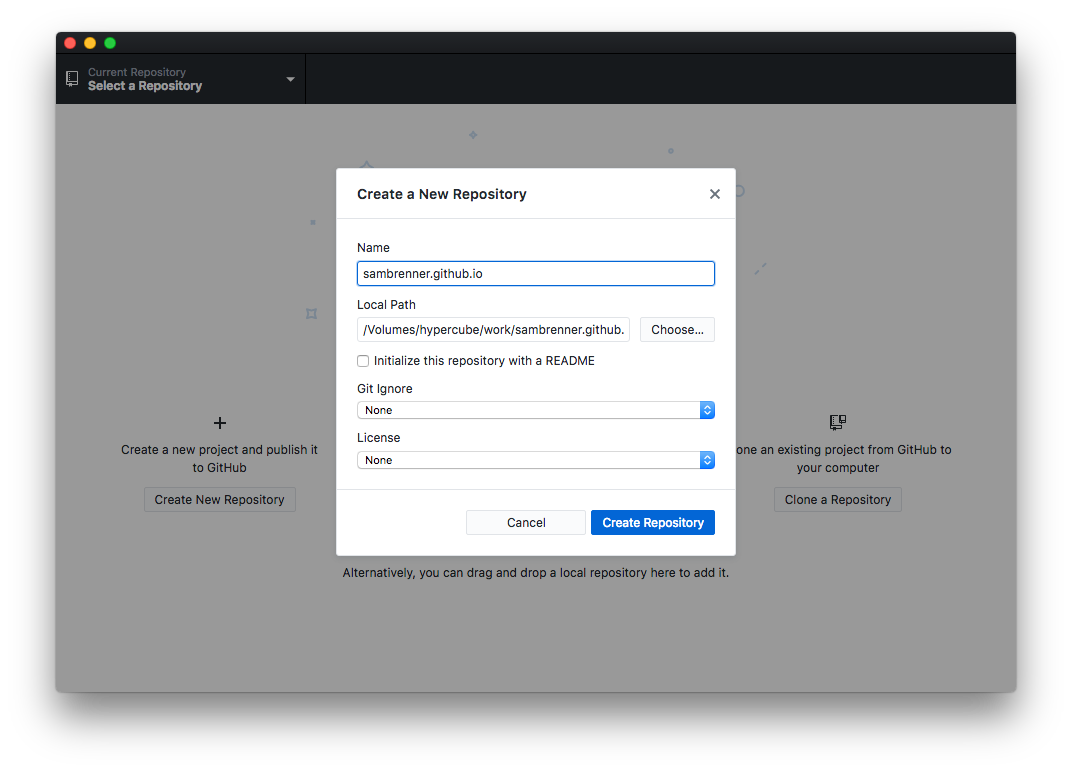
Give your repo the same name as your Github username, followed by .github.io. For example, my Github username is sambrenner, so I name my repo sambrenner.github.io. This is required to use a feature of Github called "Github Pages," which automatically makes a public website out of our repo. The local path of your repo should be where ever you want to keep your files on your computer. You can leave the rest of the fields as they are and then click the "Create Repository" button.
Open your repository in Finder (the quick way to do this is through the menu bar by clicking Repository > Show in Finder). Then, drag this folder on to your Atom window. You can close the Packages tab in Atom if you still have it open.

Still in Atom, right click on your project folder and select "New Folder."Make a new folder called core-interaction. This will be where you keep all projects for this class. If you want to make subfolders within this folder to keep your projects organized, please do.
Let's pull a quick homepage together so we have something to push to Github. Right click on your new folder and click "New File." Name your file index.html. Add some HTML and then save your file (we'll review HTML in more depth next week).

Go back to Github Desktop and you will see that it has picked up on your new folder and file(s).
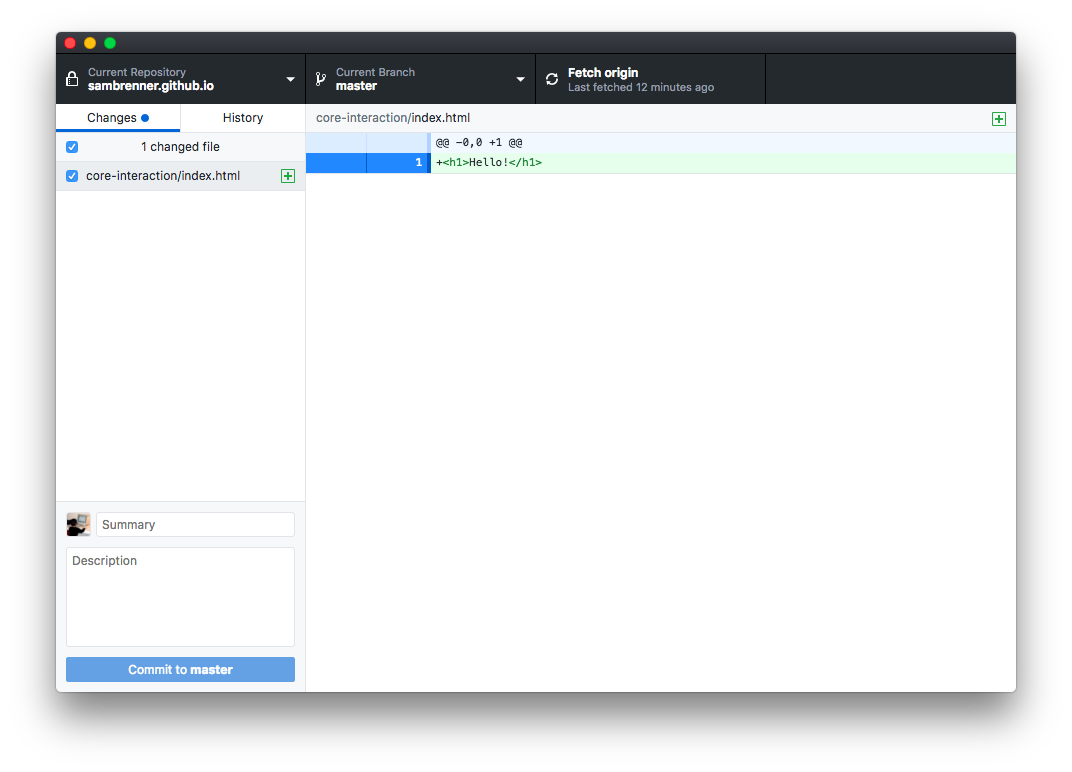
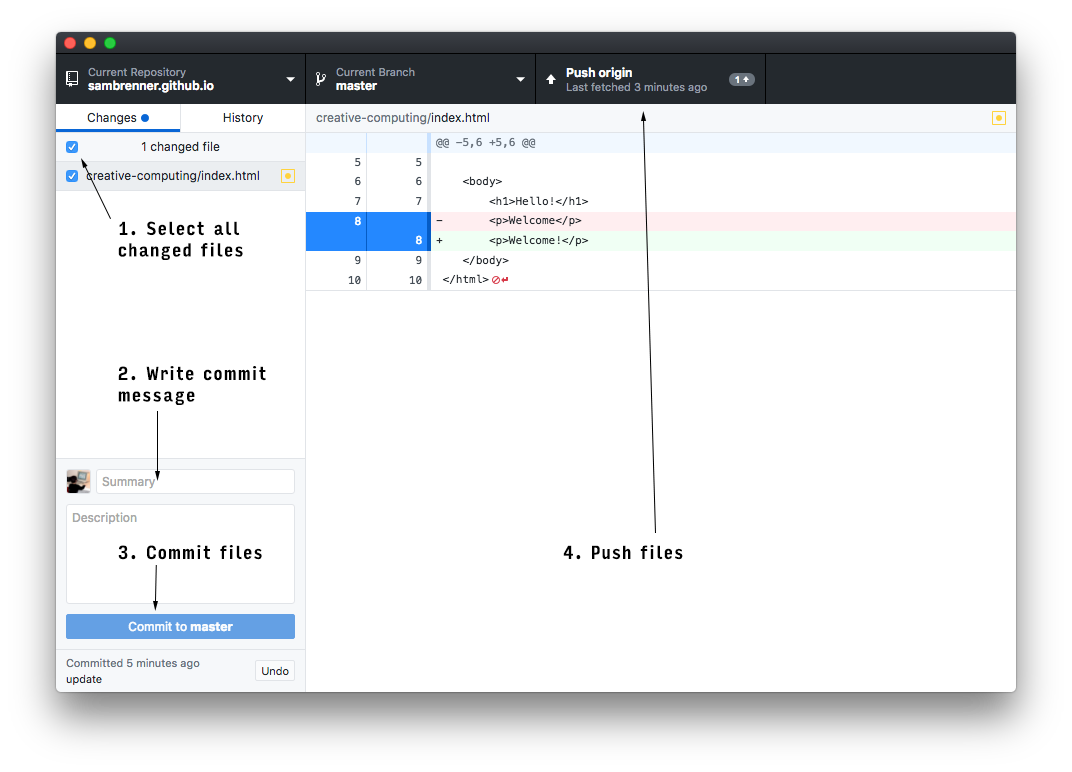
Only two more steps! Next we have to commit your changes, which is our way of letting Github know what you want to deploy. In this class, this will generally be everything, so we can click the checkbox next to "x Changed Files" in the top left, write a message where it says "Summary" in the bottom left, and then click "Commit to Master". Then, Github desktop updates to say that nothing has changed since the last commit.
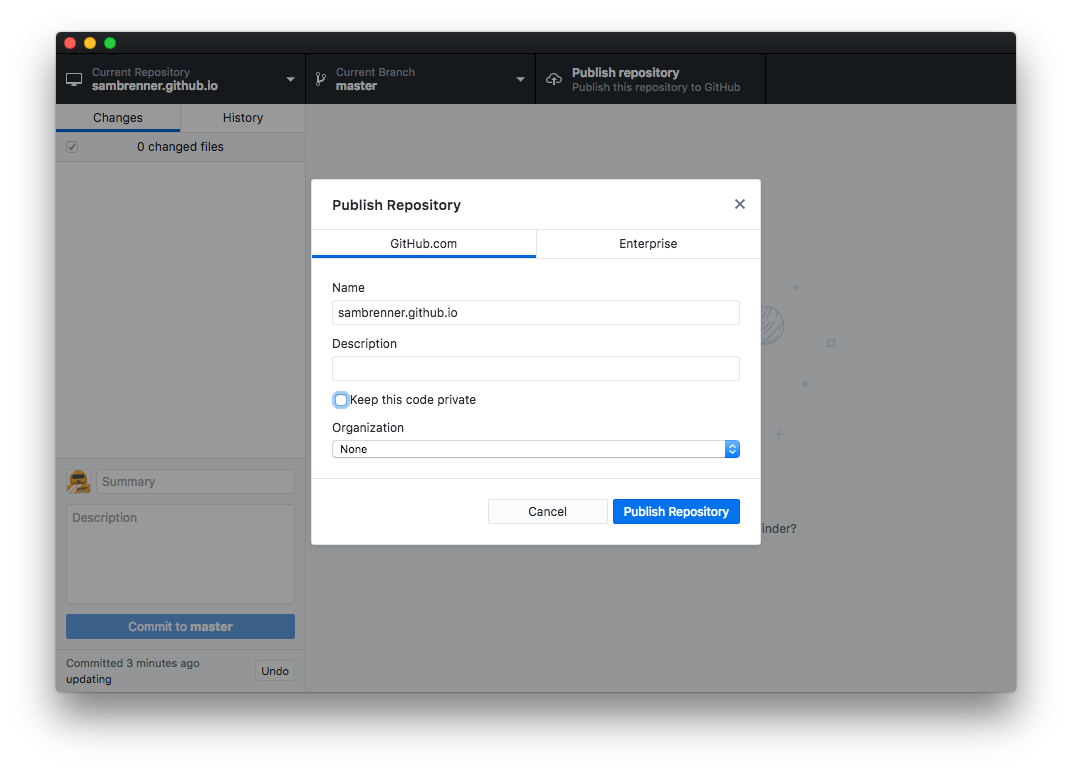
Finally, click the "Publish repository" button in the top right. Uncheck the box that says "keep this code private" and then click "Publish Repository".
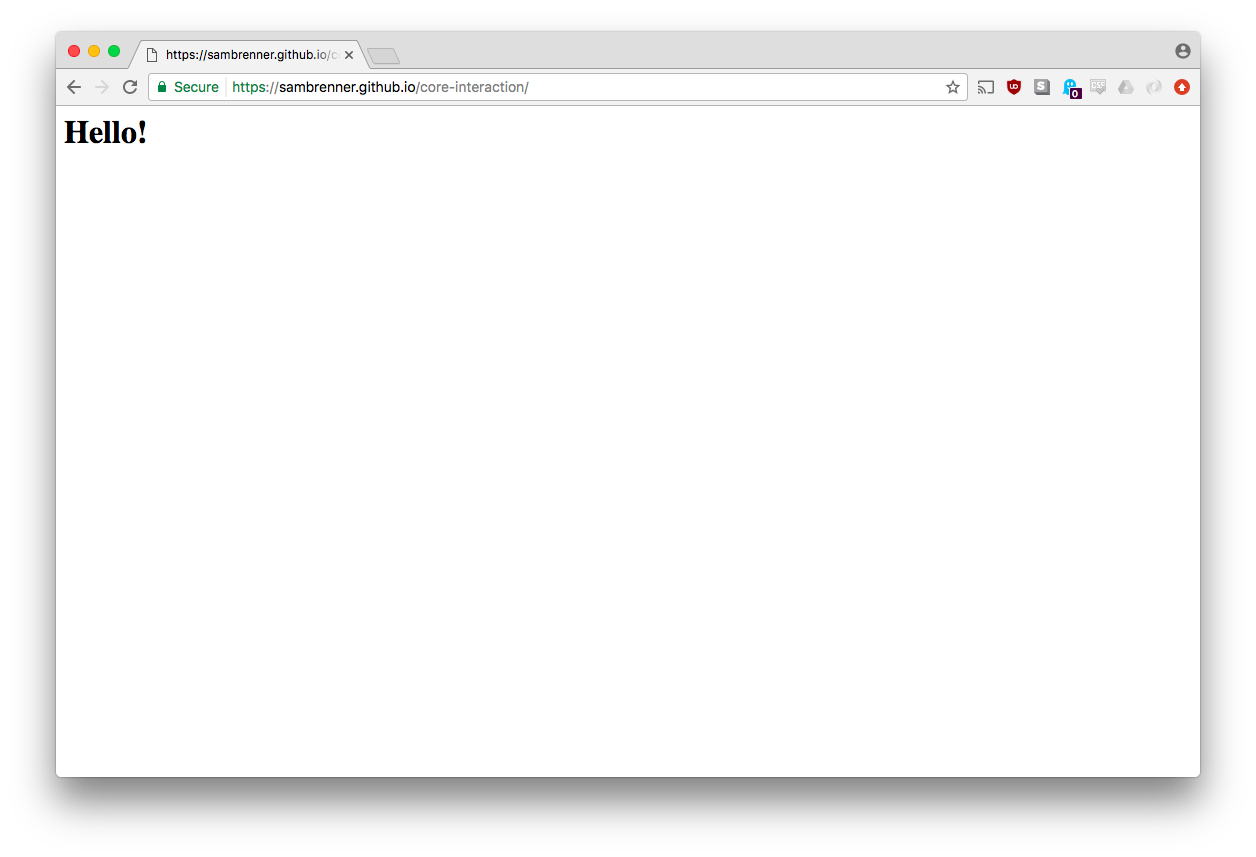
Now, I can go to myusername.github.io/core-interaction in Chrome and see my work on the internet! Going forward, all your submitted assignments should be subfolders in this repo. All the URLs you will submit on Canvas should be these URLs.
Every subsequent time your want to make changes, you will repeat these steps.
- Select all changed files
- Write a commit message
- Commit your files
- Push your files (after the first time, the "Publish" button changes to "Push" but it does the same thing)