Creative Computing: Week 5
Javascript and the JS Console
Assignments
- Random _____ Generator: Create a page that generates a random "_____" every time you refresh. This could be a random song, poem, story or something else - be creative! Due Week 6.
- What is Code?, Paul Ford, 2015
Assignment References
Class Notes
Javascript Console
Just like how we used the web inspector to observe and debug our CSS, we can do the same for Javascript. In your web inspector, there is a tab at the top called "Console." When you click on this tab, you are presented with a blank window which we can use to input and run Javascript.
The Javascript console is an important tool. You will use it to view errors and to debug or inspect your code. For right now, we can use it to explore some Javascript basics.
Intro to Javascript
In class, we covered these aspects of Javascript:
- Data types, such as numbers, strings (sequences of literal characters), booleans (true/false) and arrays (lists).
- Variables, which let us store information for later use.
- Properties and functions that are built in to varying data types, which let us examine, change and query our variables.
- Conditional statements and comparison operators, which let us make logical decisions in our code.
- Loops, which let us repeat code and move through arrays.
Let's go through those again now.
The first thing we did in the Javascript console was to enter two different commands:
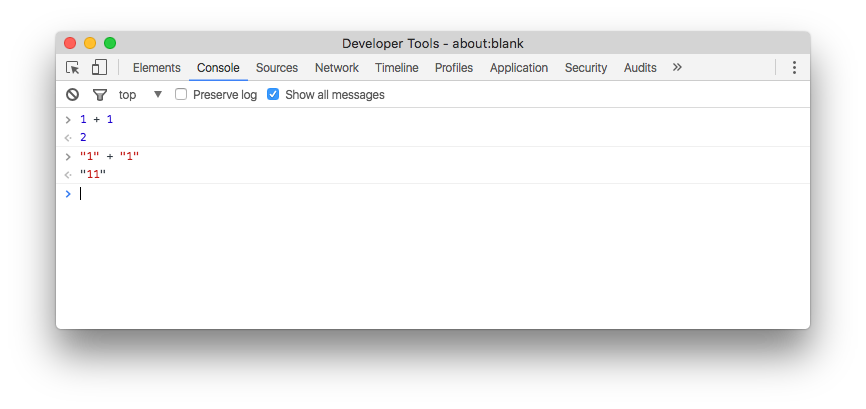
The first command, 1 + 1, outputs the number 2, as we would expect. But the second command, "1" + "1", outputs "11". Why? In the first example, we were adding numbers together. When we type a number directly in our code, Javascript interprets it as the value that the number represents. When we put quote marks around it, however, we are telling Javascript to interpret the value as the literal symbol "1". This is called a string. We will use strings mostly for words - instead of "1" + "1", we could have written "My name is " + "Sam" and Javascript would effectively do the same thing.
The next thing we did was to explore properties and functions contained within a string. For example:
"Hello World!".length;                 // 12
"Hello World!".toUpperCase();          // "HELLO WORLD!"
"Hello World!".indexOf("World");       // 6
"Hello World!".indexOf("Moon");        // -1
In all of these examples, the dot, ., is used to access the properties and functions of the string. Also note that we end every statement with a semicolon, ;, which means, "I'm done!"
The first example, length, is a property. Strings don't have too many properties, and in fact, this is the only one we'll really ever use. It tells us how long the string is, and if you count it yourself, you will find that there are 12 characters in "Hello World!". Remember that a space still counts as a character.
The second example calls a function named toUpperCase on our string. You can guess based on its name what that function might do! The two parentheses at the end of a function's name means "run this function," and the result is a copy of our string with all of the letters turned into uppercase.
The third and fourth examples introduce something new into a function call: parameters. Parameters are additional pieces of information that a function needs to work correctly. indexOf is a function that tells us where in a string that another string begins - where in "Hello World" does "World" begin? We can run the function with our string to search for - "World" - in between the parentheses. This is called "passing," as in I am passing the string "World" to my function so it can work correctly.
We can also use indexOf to tell if a string appears in another string at all. When I ask where "Moon" starts in "Hello World!", the answer is -1, which means it's not there at all. How can we know that -1 means the string is missing? Because it's all in the documentation, which, in this case, I found by searching for "indexOf javascript" in my search engine of choice.
Variables
What if I don't want to keep typing "Hello World!" every time? If I want to save a piece of information - a number, a string, the result of a function, or any other data type we will encouter later - I can save it as a variable.
var myVar = "Hello World!";
myVar.length;                    // 12
myVar.toUpperCase();             // "HELLO WORLD!"
myVar.indexOf("Moon");           // -1
myVar                            // "Hello World!"
There are four parts to making a variable. First, we use the keyword var to let JavaScript know that we're making a variable. var is a special word and we shouldn't use it anywhere else. The next part is the name of our variable. In this case, the name is myVar. The third part is the equals sign. Everything that follows the equals sign, until we hit our semicolon, will be executed by JavaScript and the value will be assigned to myVar. That's the fourth part: the statement to run and assign to the variable. In this case, it's just a string. Once we've done that, we can call all the same functions and properties on myVar as we could on any other string.
Notice how even after calling myVar.toUpperCase(); that the value of myVar is unchanged. How would we overwrite myVar with the value of a new function? Hover here for an answer: myVar = myVar.toUpperCase();
Booleans and Comparison
Booleans are a data type that has only two options: true or false. Like var, true and false are special words in JavaScript. We're not going to see them directly all that often, however. Instead, we use comparison operators to generate boolean values for us. Here's an example:
"Cat" == "Dog"                 // false
"Cat" == "Cat"                 // true
"Cat".toLowerCase() == "cat"   // true
==. == is a comparison operator, meaning it takes what is on either side of it and compares them according to a certain rule. In this case, the rule is "are they equal to each other?" If that's the case, then the result is true, otherwise it's false. There are other comparison operators, for example:
1 < 0                  // Is 1 less than 0? false!
1 > 0                  // Is 1 greater than 0? true!
8.9 <= 9               // Is 8.9 less than or equal to 9? true!
"Happy".length >= 5    // Is the length of the string "happy" greater than or equal to 5? true!
There are a few more that we'll get in to next week.
JavaScript in HTML
At this point, the console will stop being a good place for us to write JavaScript. When we were in class, we made ourselves a new HTML page and a new JavaScript file called week5.js. Just like we used the <link> tag to import a CSS file last week, we can use the <script> tag to import JavaScript. That looks like this:
<script src="week5.js"></script>If you put that in the <head> of your HTML file, we can now switch to week5.js and do all our typing in there.
There's one last thing we need to remember from here on: in the console, we could just run a function and the console would show us the output. That's not the case anymore. If we want to see something on the console, we need to pass it the value to show with console.log(). For example, console.log(myVar) will show us the value of myVar.
Conditionals
It's great that we can figure out if a string exists in another string, but what good is it if we can't do anything with that information? That is where conditional logic comes in. Conditional logic lets us say "if this, then do that." "If the dog is a good dog, then it gets a treat." "If you help me move, I will buy you a pizza. Otherwise, our friendship is over!" These are all examples of conditional logic. Conditional logic ultimately comes down to one thing: is it true?
Using the example of our strings, here's how we translate that to JavaScript:
var myVar = "Hello World!";
var moonInString = myVar.indexOf("Moon");

if (moonInString == -1) {
    console.log("The word 'moon' does not appear in " + myVar);
} else {
    console.log("The word 'moon' appears in " + myVar + " at index " + moonInString);
}
The new statement here is if. An if block has at least three parts: First, the word if, a special word in JavaScript. Next, a set of parentheses. Inside the parentheses we can put whatever comparison operator we want. If the result of the statement is true, the code inside the curly brackets will run. Optionally, we can use the word else and another set of parentheses to supply code that should only be run if the initial statement is false.
Loops
Loops let us do one thing multiple times. Here's a basic loop:
for (var i=0; i<10; i+=1) {
    console.log(i);
}
The first line contains a three-part statement that defines how our loop works. Each part is separated by a semicolon. The first part, var i=0, defines the start point of our loop. The second part, i<10, defines the condition under which our loop will continue to run. As long as this statement is true, our loop keeps running. The third part, i+=1, is what to do after every loop. In this case, it's add one to i. i+=1 is shorthand for i=i+1. They do the same thing, which is to increment the value of i by one.
Then we have two curly brackets. Everything inside the curly brackets will run once for every loop. In this case, just log the value of i. Run the code and you should get a list of numbers from 0 to 9. You don't see the number 10 because 10 < 10 is false. This stops the loop from running any further.
Try playing around with the parameters of the loop and see what happens. What happens when you change the initial value of i from 0 to 5? Or when you change the end condition to i < 1000? Or when you increment i by other numbers, like 2 or 10?
Arrays
The final data type we learned in class was the array. Array are just lists of things. They can contain anything!
var myArray = ["Cat", "Dog", "Chicken"];
The above code declares an array with three elements. The square brackets denote the beginning and end of the array, and a comma separates every element within it. Which of the following are valid arrays?
[1, 5, "Octopus"];               // 1
40, 50, 60;                      // 2
[true, true, true, true, true];  // 3
"[1, 2, 3]";                     // 4
Hover here for an answer: 1 and 3 are valid arrays. 2 is invalid because it has no square brackets. 4 is a string because it is wrapped with quotes.
We can access individual array elements by their index. Array indexes start at 0 and go up. For example:
var myArray = ["Cat", "Dog", "Chicken"];
console.log(myArray[0]);                    // "Cat"
console.log(myArray[1]);                    // "Dog"
console.log(myArray[2]);                    // "Chicken"
Arrays also have built in functions and properties too. Like a string, they have length to tell us how long they are and indexOf to tell us where something lives inside of an array. They also have a function push which allows us to add something to an array:
var myArray = ["Cat", "Dog", "Chicken"];
myArray.push("Butterfly");
console.log(myArray);                     // ["Cat", "Dog", "Chicken", "Butterfly"]
Arrays and loops go well together. For example, we can loop through an array to see everything in it:
var myArray = ["Cat", "Dog", "Chicken"];

for (var i = 0; i < myArray.length; i+=1) {
    console.log(myArray[i]);
}
Notice that instead of hard-coding a number to finish our loop at, we changed it to reflect the length of the array. No matter how many elements we add to the array, that loop will still work!
Randomness
The last thing we covered was randomness. JavaScript contains a random number generator, which we can access like this:
var random = Math.random();
console.log(random);
The Math library is built in to JavaScript and contains many other mathematical functions. Math.random(); gives us a random number between 0 and 1. This is useful because it's easy for us to scale that range up to whatever range we need.
For example, let's say we want to generate a random means of communication that we previously employed to contact Drake. First we need to seed an array with verbs implying communication and seed a second array with nouns on which communication happens:
var verbs = ["call", "yell at", "email", "talk to", "whisper to", "text"];
var nouns = ["cell phone", "Microsoft Zune", "Palm Pilot", "Apple Newton", "carrier pigeon"];
Now we want to pick, at random, one string from each array. To do this, we need to generate a random number and scale it to the length of the array so we have equal odds of picking all elements. Let's just do it for verbs to start:
var randomVerbIndex = Math.random() * verbs.length;
The * symbol is used for multiplaction. So now instead of a random number between 0 and 1, we have a random number between 0 and however long our array of verbs is. See where this is going?
If you console.log() the random number right now, you'll see that it has a bunch of decimal places. If you tried to look up an element in our array with this, you will get an error - give it a shot. This is because array indices are whole numbers: 0, 1, 2, etc. There isn't anything in our array at the 1.5 position, it's just not possible. So the next thing we need to do to our random number is round it down. There's another math function for this purpose:
var randomVerbIndex = Math.random() * verbs.length;
randomVerbIndex = Math.floor(randomVerbIndex);
console.log(randomVerbIndex);
If you refresh your page now, you should get nice whole random numbers that are ready to go into our array. Now we can actually pick the random elements:
var verbs = ["call", "yell at", "email", "talk to", "whisper to", "text"];
var nouns = ["cell phone", "Microsoft Zune", "Palm Pilot", "Apple Newton", "carrier pigeon"];

var randomVerbIndex = Math.random() * verbs.length;
randomVerbIndex = Math.floor(randomVerbIndex);

var randomNounIndex = Math.random() * nouns.length;
randomNounIndex = Math.floor(randomNounIndex);

var randomVerb = verbs[randomVerbIndex];
var randomNoun = nouns[randomNounIndex];
Now we're ready to generate our full random Drake historic means of communication. The last new thing we learned in class was document.write(), which is like console.log() except it goes to the main page instead of to the console.
document.write("<h1>");
document.write("You used to " + randomVerb + " me on my " + randomNoun);
document.write("</h1>");
You can see that document.write() supports HTML, so we can use that to our advantage as well. You can see a finished, working random Drake communication generator here.
Miscellaneous Notes
- The convention for writing names of things in JavaScript is called "camel case." It works like this: the first letter of a word is lower case. Every letter for the rest of that word is also lower case. Every subsequent word begins with a capital letter and finishes off with lowercase letters. It makes words that
lookLikeThis. The reason we do this is because spaces aren't allowed in variable or function names, but sometimes we want to use multiple words. Camel case helps us read a multi-word variable or function name without needing spaces. - You can comment code with
//. Anything following//until the end of that line will be commented out, meaning you can read it, but the browser will ignore it. You can also comment out larger blocks with/*and*/. Everything in between those two sequences of characters, including new lines, will be ignored.
References
- Code Academy: JavaScript
- JavaScript For Cats
- MDN: JavaScript Basics
- Remember, you can search for anything you have questions about! Knowing how to query and understand reference materials is a skill worth developing.