Creative Computing: Week 12
Interface Concept Presentations
Assignments
Interface: Build your API interface! Due week 15.
Getting Started with the Cooper Hewitt API
Jump to Creating an Account, Understanding Objects, Understanding AJAX, or Using the Cooper Hewitt API.
Creating an Account
Before gaining access to the Cooper Hewitt's API, we need to make an account. We can do this by going to the Cooper Hewitt Collection Site, selecting the "You" dropdown from the top left, and selecting "Create an Account." This gives us access to the API Homepage, which will serve as a reference going forward. If you ever need to find something out about the API, that page is a good place to start.
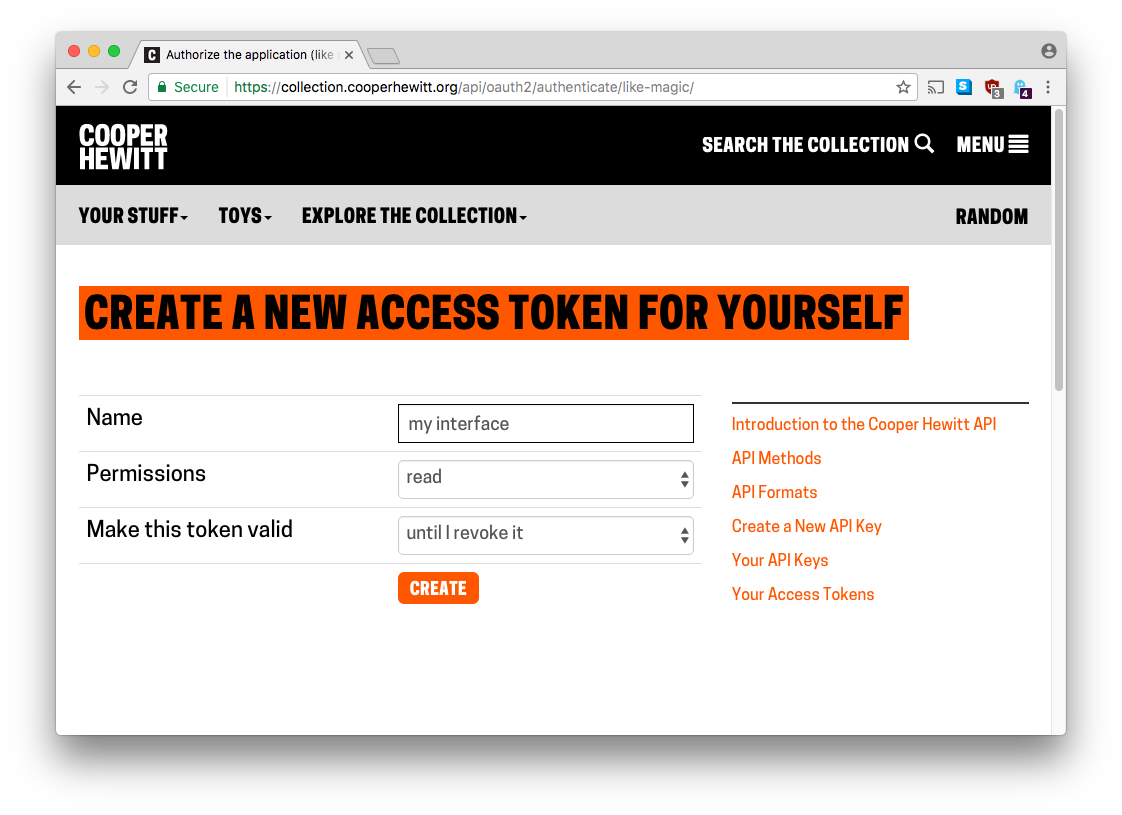
Once you have your account, the next thing you need to do is create an access token. Access tokens are what the API uses to know that you are you, and not somebody else. Every time you request information from the API, you will provide your access token so the API knows who you are. You can create an access token on this page. Enter a name for your application, set the permissions to "read," and make the token valid until you revoke it. Agree to the terms, and you will be given an access token. We will need this token later on, so leave this tab open. If you ever need to get your access token again, you can find it on the list of all your access tokens.
Understanding Objects
There's one last data type in JavaScript we haven't covered that you'll need to know before proceeding: objects. Objects are like Arrays in that they can contain many other kinds of variables. The difference with objects is that the order doesn't matter, and instead of a position in an array (0, 1, 2, etc.), the object's elements have names.
Here's an empty object:
var myObject = {};
We can add elements to the object with what are called "key-value pairs." The key is the name, and the value is the information represented by the key. If you have multiple key-value pairs, you separate them with a comma.
var myObject = {
    "name": "Ada Lovelace",
    "born": 1815
};
Keys are always strings, but the value can be whatever you want: strings, numbers, functions or even more objects.
Later on, when you need to get something from the object, you have two ways to access it:
myObject.name // "Ada Lovelace"
myObject["born"] // 1815
You can also use these same references to change the values:
myObject.name = "Charles Babbage";
myObject.born = 1791;
We'll see some more practical examples of Objects when we start making requests of the API.
Understanding AJAX
AJAX (Asynchronous Javascript And XML) is the name of the technique we will use to get information from the API. The important word here is "asynchronous," meaning "not at the same time." When we ask the API for information, it doesn't get returned to you immediately. It will take some time, generally only a second or so, but this changes how we will write our code. You are already familiar with asynchronous code from using click events - when you bind a click event, you provide a reference to a function that will be run in the future once the element has been clicked. It's the same case here, except instead of "when the element has been clicked," your code will run when the AJAX request has been completed.
While theoretically simple, the details of implementing an AJAX request/response has a few intricacies. For this assignment, we are going to use a library that makes some of the AJAX nitty-gritty easier to use (a good example of an interface!). This particular library is called jQuery, which is a very popular and very powerful library. You can download it here (right click and "Save Link As" to a new folder. Name the file jquery.js. When you're done, make a new HTML file for your interface project and load jquery.js in a <script>. Make another JavaScript file for your own code and load that in after jQuery.
Your HTML file should look something like this:
<!doctype html>
<html>
    <head>
    </head>

    <body>
        <script src="jquery.js"></script>
        <script src="interface.js"></script>
    </body>
</html>
In your JavaScript file, let's have a look at what an AJAX request looks like:
$.ajax({
    "url": "http://newschool.edu",
    "success": onAjaxSuccess,
    "error": onAjaxError
});

function onAjaxSuccess(rsp) {
    console.log(rsp);
}

function onAjaxError(rsp) {
    console.log(rsp);
}
The $ (dollar sign) is the name of the variable that contains all of jQuery. From that, we call a function named ajax which takes one parameter. That parameter happens to be an Object containing, in this case, three pieces of information. One, the url we want to call. Two, the function we should call when the response is finished successfully, called success. Finally, three, the function we should call when the response is finished unsucessfully, called error.
If you want to run this, the first thing you need to do is get your local server running. If you need a refresher on starting your local server, it's all written up here. You need to be running your code from a server to make AJAX requests. It simply won't work without one.
So with our local server running, we can run our code. You should see this error:
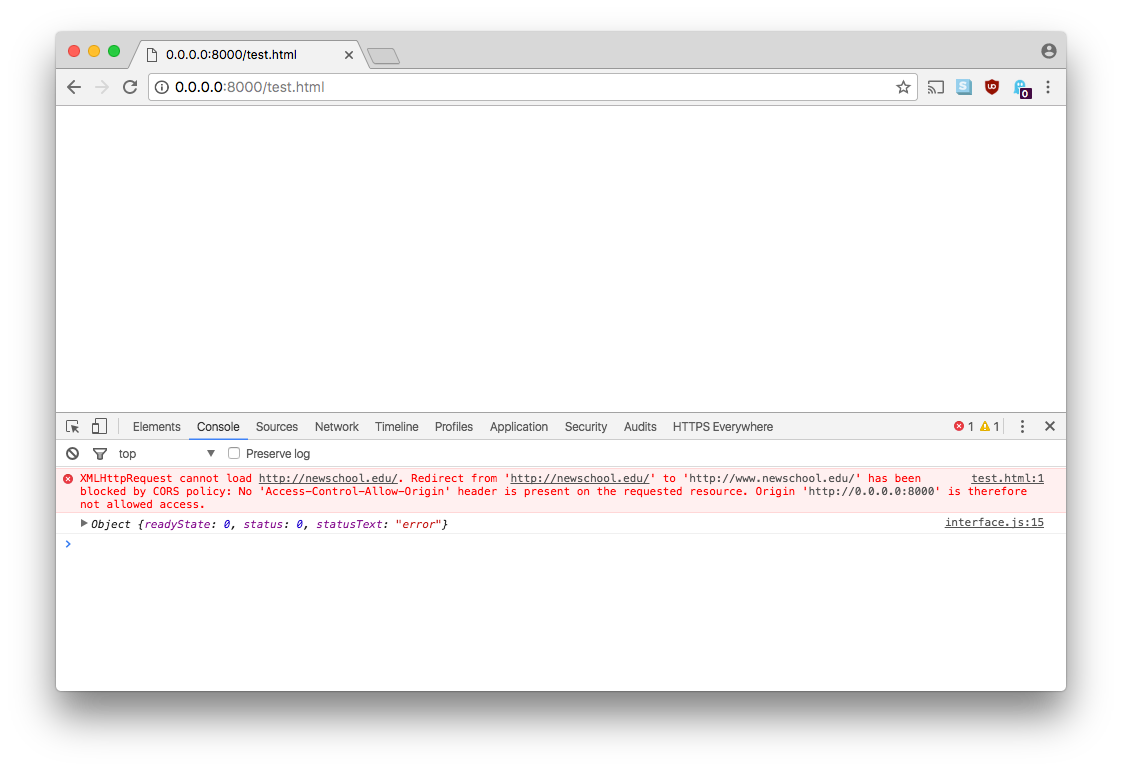
The error means that the New School website doesn't allow us to connect over AJAX (which is common on regular, non-API websites). But it also means that the connection works, so we can proceed updating our code to work with the Cooper Hewitt's API.
Using the Cooper Hewitt API
Let's go back to the Cooper Hewitt's API homepage. At the top, it says that "API requests are made by passing one or more query parameters to https://api.collection.cooperhewitt.org/rest/."
First, let's change our URL in the AJAX call to that url.
$.ajax({
    "url": "https://api.collection.cooperhewitt.org/rest/", // changed URL
    "success": onAjaxSuccess,
    "error": onAjaxError
});

function onAjaxSuccess(rsp) {
    console.log(rsp);
}

function onAjaxError(rsp) {
    console.log(rsp);
}
The two remaining pieces of information required by the API are the method we're calling and our access token. The method we're all using is called cooperhewitt.search.objects (you can see all the possible methods here). We pass this information in a parameter to the main AJAX call named data. And we can format this data as an Object, like so:
var ajaxData = {
    "method": "cooperhewitt.search.objects",
    "access_token": "YOUR ACCESS TOKEN GOES HERE"
};

$.ajax({
    "url": "https://api.collection.cooperhewitt.org/rest/",
    "data": ajaxData, // pass the data to the CH API
    "success": onAjaxSuccess,
    "error": onAjaxError
});

function onAjaxSuccess(rsp) {
    console.log(rsp);
}

function onAjaxError(rsp) {
    console.log(rsp.responseJSON);
}
If you refresh your page now, you should see another error. In your console, expand out the response object so you can read the exact error:
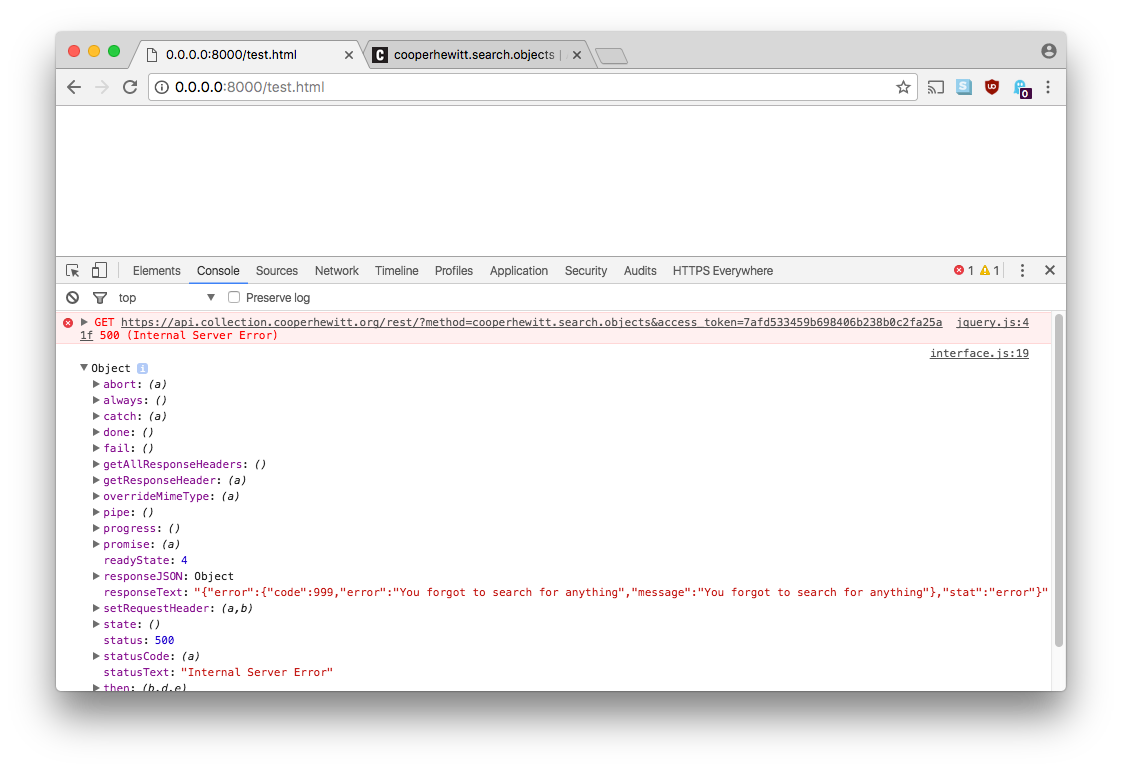
We forgot to search for anything! That's easy enough to solve. If you look at the documentation for the cooperhewitt.search.objects method here, you can see that there are all sorts of different ways we can search for objects. For this example, let's just use the general query parameter. Update your ajaxData variable so that it contains a key named "query" with the value of "computer".
Refresh the page one last time and let's see what we've got:
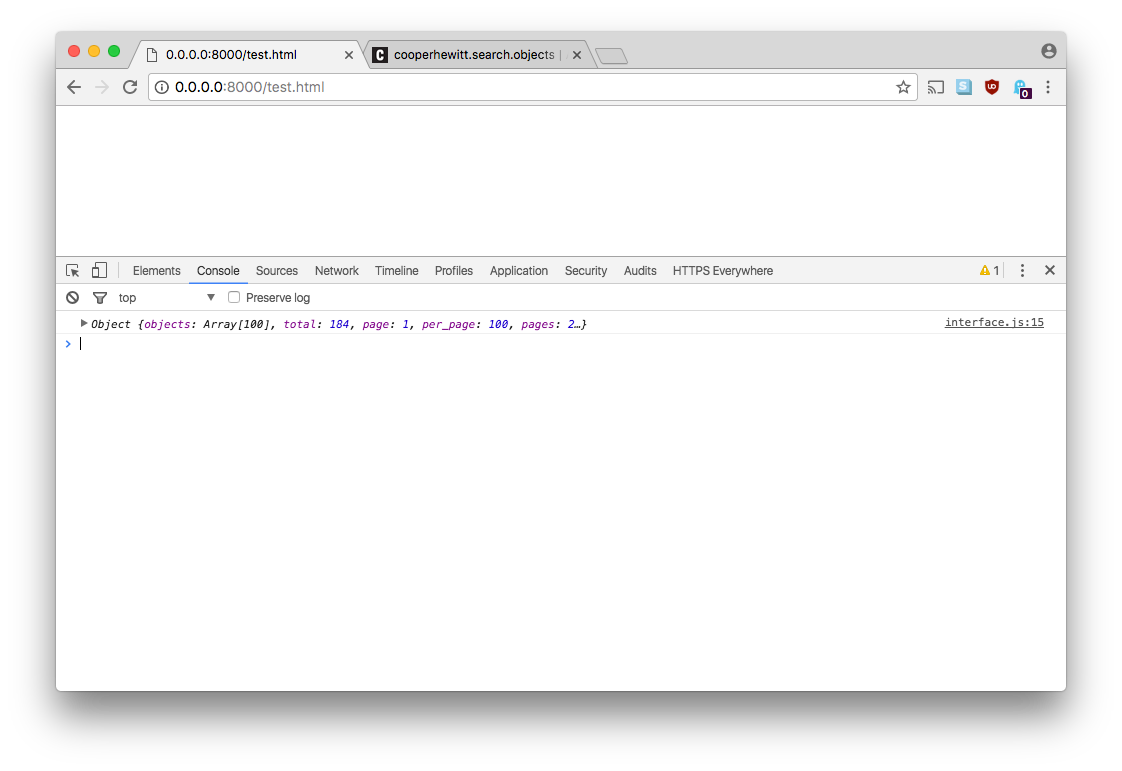
And we can start expanding this object to see what's in there:
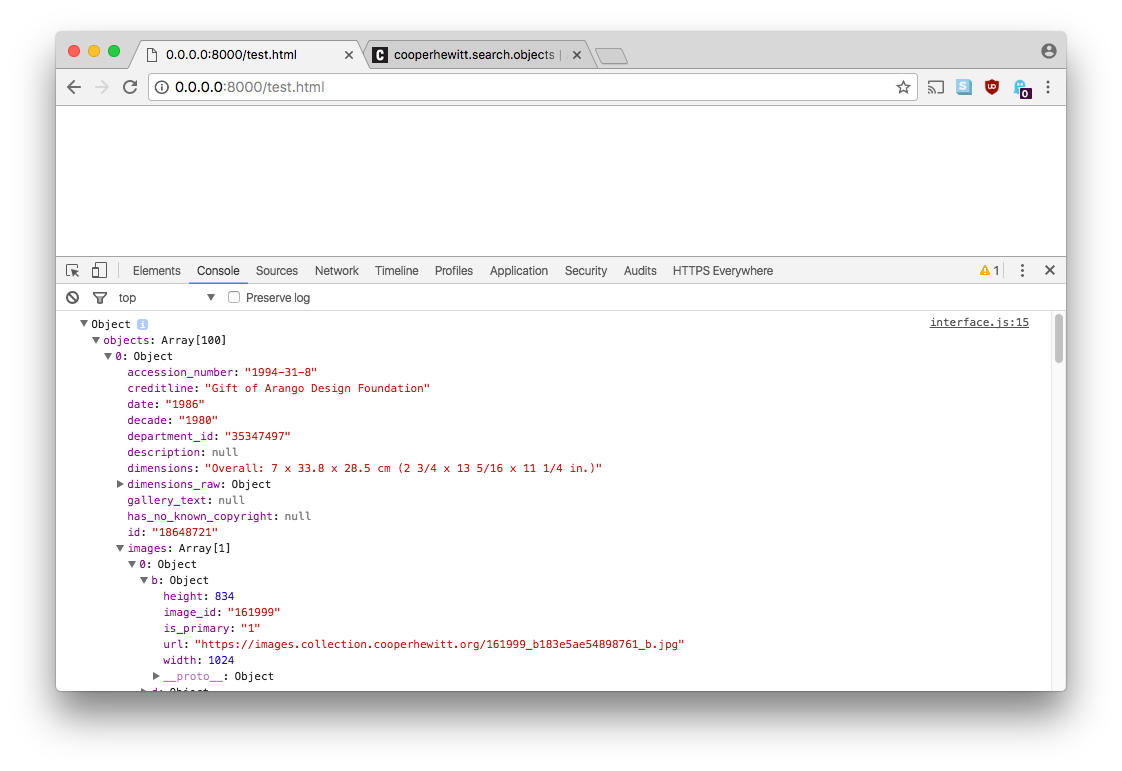
The result is a combination of everything we've covered so far: objects, arrays, strings, numbers... it goes on and on. You will certainly want to take advantage of console.log for this assignment so you can see what you're working with.
From here, what will you want to do to complete you assignment? It comes down to input and output. We hard coded the example above to just take the word "computer" as a query parameter. How is your interface going to give users a way to control what information we send to the API (input)? And once we get the data back from the API, what is your interface going to do with it (output)?